
Arduino
Arduino is an open-source electronics platform based on an ATmega328 8-bit microcontroller. It can read inputs from various sensors and send instructions to connected hardware devices. The Arduino platform also provides an integrated development environment (IDE) to write and upload code, enabling interaction with Arduino boards and external sensors.
Ultrasonic Sensor
An ultrasonic sensor measures the distance between the sensor and an object without any physical contact. It operates using a time-to-distance conversion mechanism.
How Ultrasonic Sensors Work
Ultrasonic sensors determine distance by emitting and receiving ultrasonic waves. They consist of:
- A transmitter: Sends ultrasonic waves.
- A receiver: Captures the reflected waves.
When the transmitted wave hits an object, it reflects back to the sensor. Arduino then calculates the time it took for the wave to travel to the object and return to the receiver.
Since the speed of sound in air is approximately 344 m/s, the distance can be calculated using the following formula:
Formula:Distance = Speed × Time
In the Arduino code, the duration variable captures the total time taken by the sound wave to travel to the object and back. Since this value includes the time for the wave to return, the time for a single trip (from the sensor to the object) is half of the total duration.
Thus, the formula can be rewritten as:Distance = Speed of Sound in Air × (Time Taken / 2)
Note: The speed of sound in air is 344 m/s.
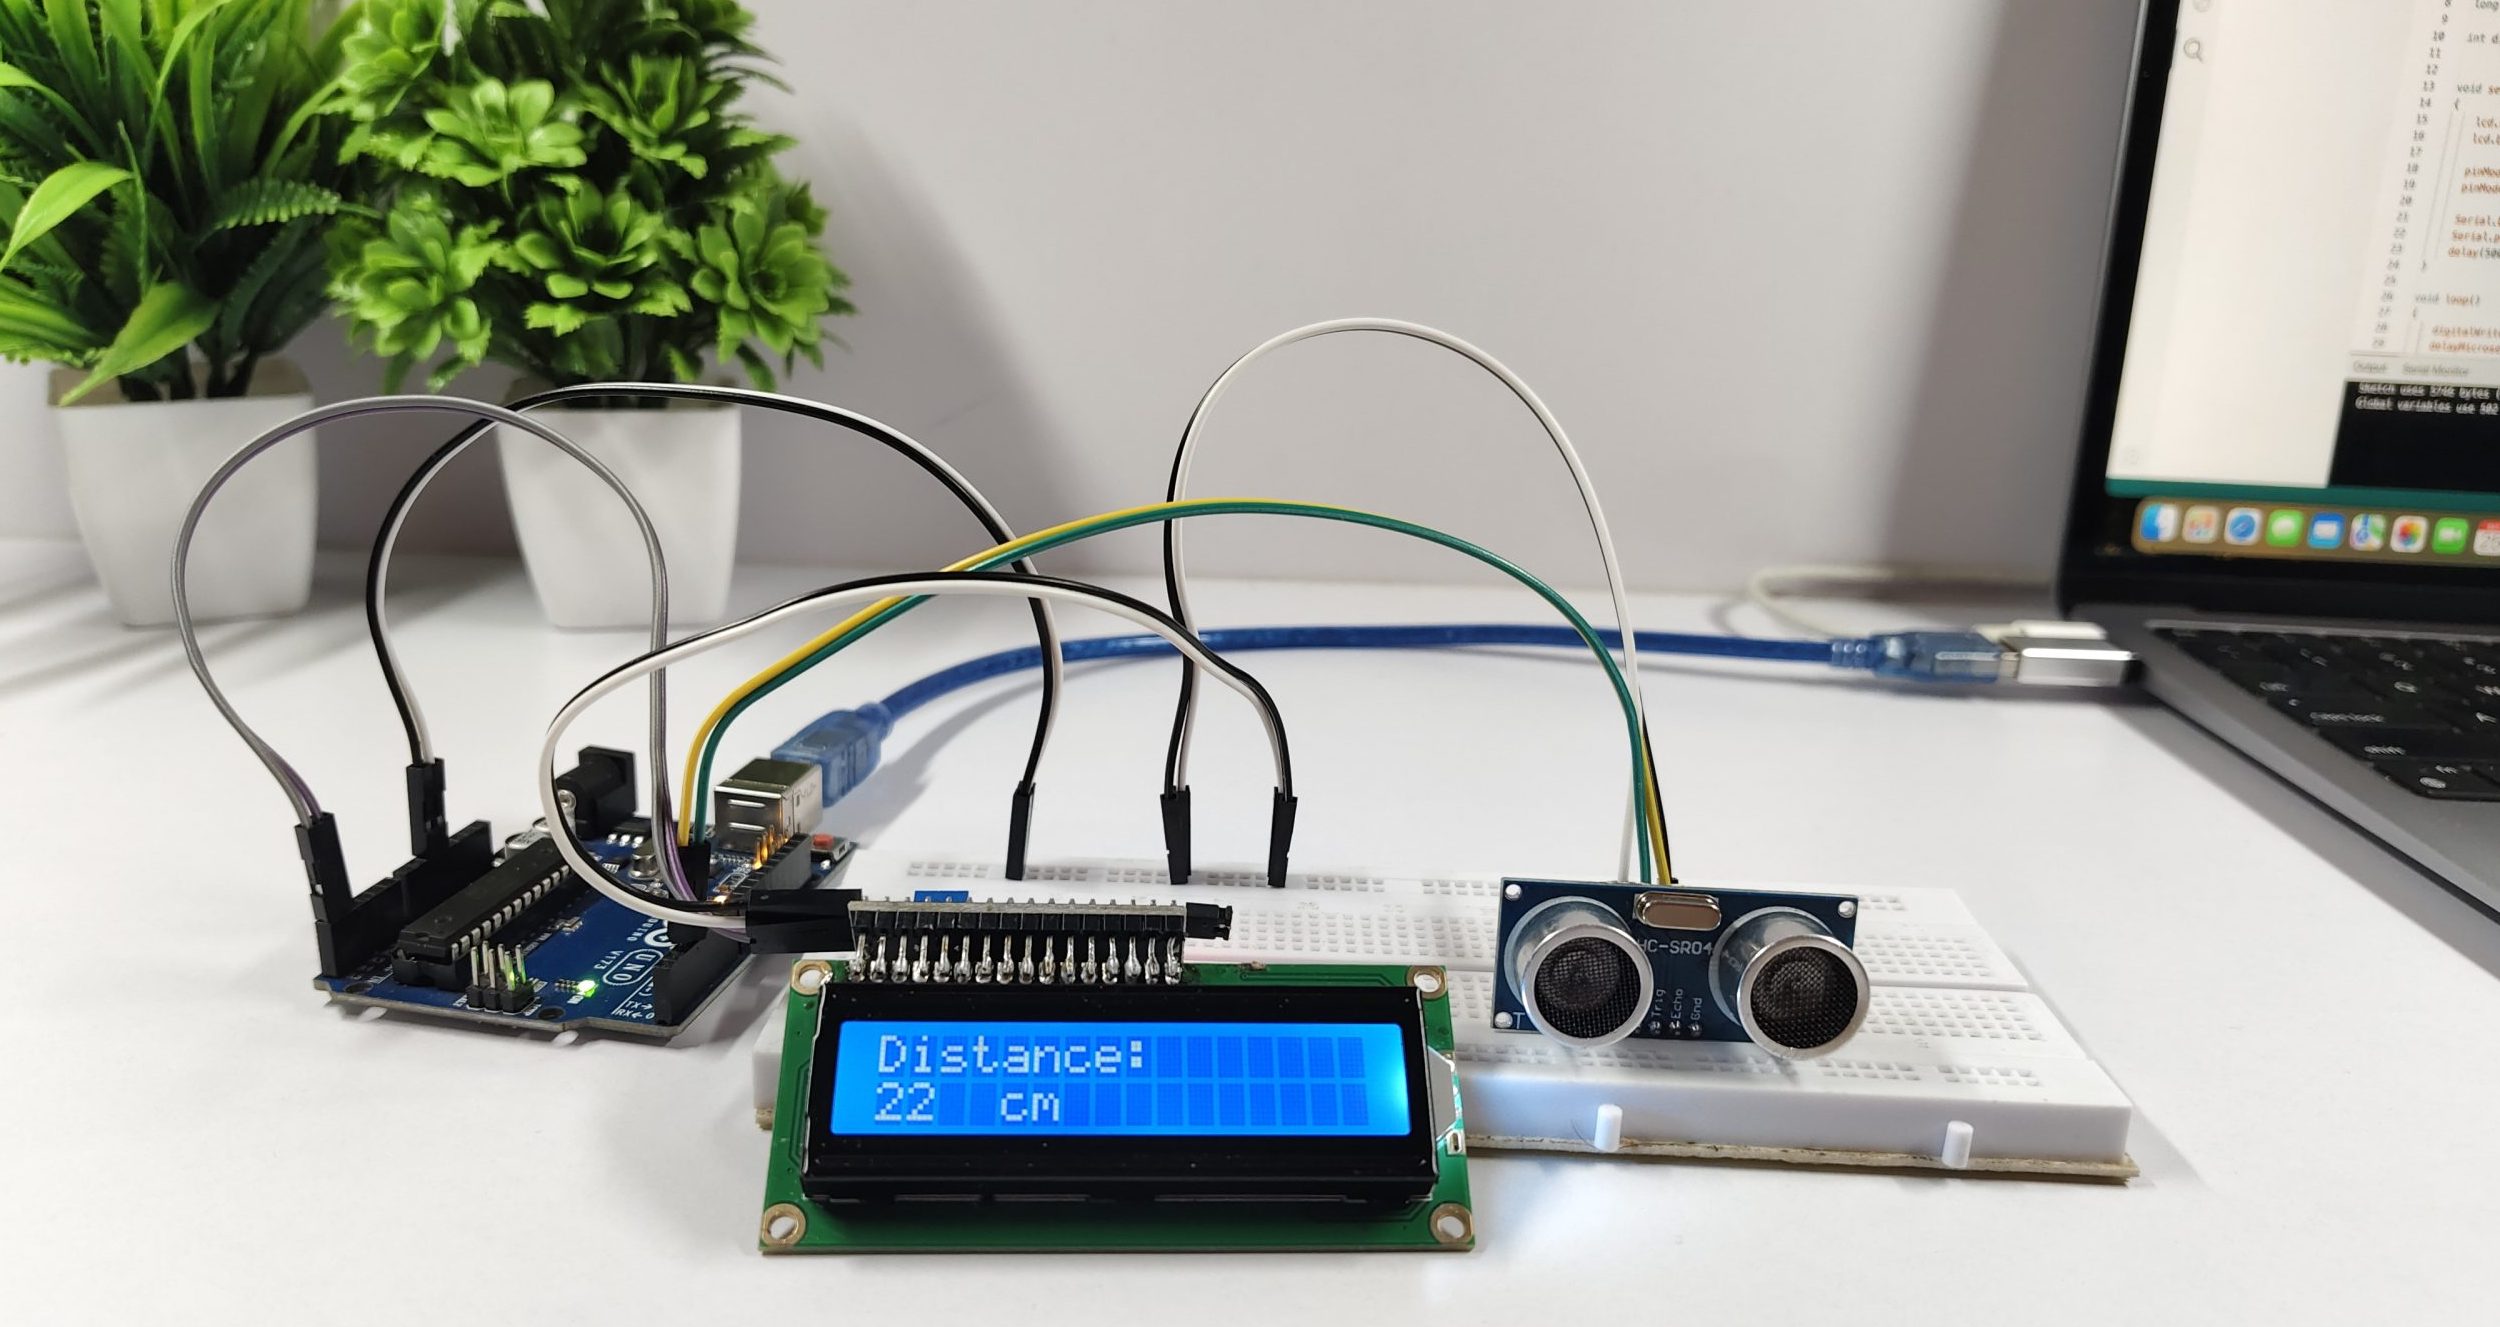
Components Required:
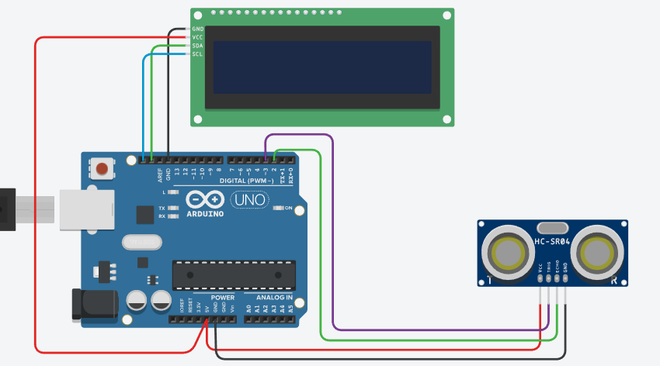
Connect the Ultrasonic Sensor to the Arduino:
- Attach the Echo pin of the sensor to the D2 pin on the Arduino board.
- Connect the Trig pin of the sensor to the D3 pin on the Arduino board.
Configure Arduino IDE:
- Open the Arduino IDE.
- Navigate to Tools > Board and select the appropriate board type (e.g., Arduino Uno R3).
- Under Tools > Port, select the correct port connected to your Arduino.
Upload the Code:
- Write or paste the code into the Arduino IDE.
- Verify and compile the code.
- Upload the compiled code to your Arduino Uno R3 board.
Circuit Diagram
Sample Code
#include <LiquidCrystal_I2C.h>

LiquidCrystal_I2C lcd(0x27, 16, 2); // (Address,Width,Height )

#define echoPin 2
#define trigPin 3

long duration;

int distance;


void setup()
{
    lcd.begin(); // initialize the lcd
    lcd.backlight(); // Turn on the Backlight

    pinMode(trigPin,OUTPUT); // Sets the trigPin as an OUTPUT
    pinMode(echoPin, INPUT); // Sets the echoPin as an INPUT

    Serial.begin(9600);
    Serial.println("Distance measurement using Arduino Uno");
    delay(500);
}

void loop()
{
    digitalWrite(trigPin, LOW);
    delayMicroseconds(2);
    digitalWrite(trigPin, HIGH);
    delayMicroseconds(10);
    digitalWrite(trigPin, LOW);
    duration = pulseIn(echoPin, HIGH);
    distance = duration * 0.0344 / 2;
    Serial.print("Distance: ");
    Serial.print(distance);
    Serial.println(" cm");

    lcd.clear(); // Clear the display buffer
    lcd.setCursor(0, 0); // Set cursor for "Distance:" (Column, Row)

    lcd.print("Distance:"); // print "Distance:" at (0, 0)
    lcd.setCursor(0,1); // Set cursor for output value  (0, 1)

    lcd.print(distance); // print Output in cm at (0, 1)
    lcd.setCursor(4, 1); // move cursor to   (4, 1)
    lcd.print("cm"); // print "cm" at (4, 1)

    delay(350);
}